Part One
The Bread Lab Collective is encouraging the use of wholemeal in every-day bread to bring better nutrition to the world. They have a recommended formula to follow, but whilst reading up on it, I was inspired by Michael Wilson’s post on The Fresh Loaf. I modified his recipe from his blog to see what damage I could do with it!
This version is based on a sourdough starter with a commercial yeast kick.
INGREDIENTS:
- 125g of Italian Sourdough Starter (45% hydration)
- 500g Wholemeal Flour (Duchy Organic Stoneground Strong Wholemeal)
- 400g water at 25°c
- 50g Light Olive Oil
- 25g Organic Honey
- 10g Fresh Yeast
- 12g fine salt
METHOD for STARTER
- I took 25g of active 100% Hydration Rye starter and added 100g SWBF and 45g water to approximate Michael’s Italian SD starter.
- Rolled in to a ball and snipped a cross in the top to allow expansion without tearing
- 10hrs to mature, the ball was approx twice it’s size by time I used it
METHOD for BREAD
- In my Ankarsrum with the roller, mix the flour with 350g of water and autolyse for 30mins
- In a separate jug, mix the remaining water with yeast and honey and allow to activate until autolyse is finished
- With the mixer running, drop in small chunks of the starter until incorporated
- Add yeast/water mix, oil and salt and mix on low speed until incorporated
- Mix on mid/high speed for 16mins until stretchable for 20cm+
- Stretch & Fold, rest for 30mins
- Knock-back, divide in two, pre-shape and rest for 30mins
- Shape and place in 1lb tins, final prove for 30mins. (At this point the loaves were nicely rounded about 3cm above the lip of the tins)
- Bake uncovered at 200°C for 25mins with a tray for steam
COMMENTARY
I started from the point of view of an amateur baker with a few 100% whole wheat loaves under my belt that had sunk in the oven.
Michael hadn’t included a method with his recipe, so I guessed everything! And I realised I had run out of eggs so I omitted 3% egg yolk.
I figured that building good gluten is most important in this high hydration loaf to avoid collapse, hence the long mix time in the mixer
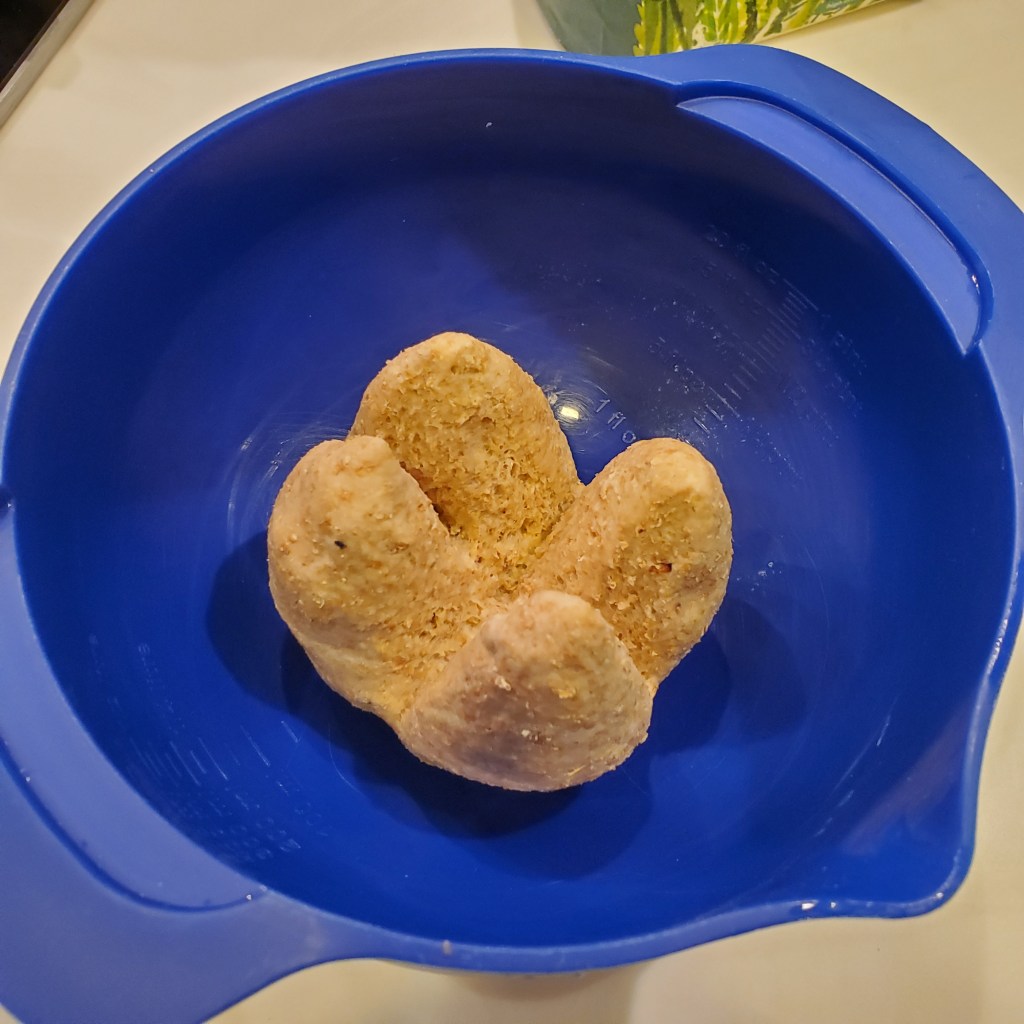
Following a 30 minute autolyse of just flour and water, and after mixing for 16mins, the dough went in to a bowl for a S&F and 30 mins rest.

After 30mins, I was expecting a second S&F but came back to this:

That extra commercial yeast sure did add a kick to the prooving.
I was expecting to treat it like a sourdough and do four stretch & folds over 2 hours. But after the first 30 mins the loaf was more than doubled, so I moved on to the knock-back and pre-shape. From this point of view, despite only 2% fresh yeast, I treated this as a regular commercial yeast loaf.
So I went straight to pre-shape/bench rest/shape and final prove.
My kitchen here in Hong Kong runs at about 25°C, a cooler place and a longer rise might have been preferable
During the shaping, I was nervous handling such a high hydration, but it felt generally stiffer than a 80% SWBF would do. Quite sticky too.
Final shape was a fold-and-roll as demonstrated by Bake With Jack.
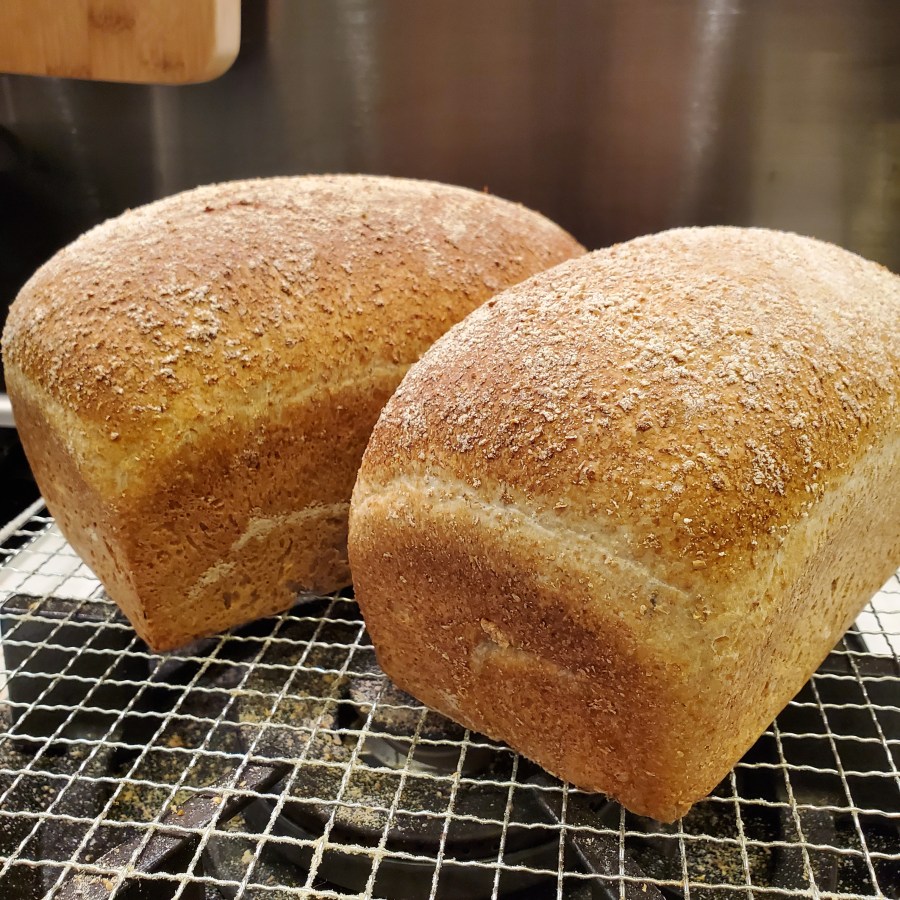
Once in the tins and dusted, I kept an eye on the rise after 20mins. At 30mins I got a good finger-test and didn’t want to risk deflation from over-proving so in to the oven.
This was the end result:

It basically looks and feels like a Wholemeal Hovis.


EVALUATION & LEARNINGS
Overall, very happy with this as a first attempt. A couple of holes larger than I would have liked. But the bread itself I think is VERY approachable.
It’s soft, easy-to-slice, easy to spread butter on. It doesn’t have the depth of texture and complexity of taste I would get from a normal WW sourdough, but then this challenge is for “approachable” and I feel this fits the bill very well.
Next up, I aim to see if I can replicate this with either my 100% rye starter or purely commercial yeast.
Feedback and ways to improve much appreciated.

One thought on “The Approachable Loaf”