(If you want recipes without the waffle, you can click here for Twisty Sourdough and Twisty Country Sourdough).
So I’d been baking basic white bread for a while, and browsing baking forums for tips on improving my loaves. I couldn’t help but notice the hype around Artisanal Sourdough and all the faithful followers.
Despite the success of Twisty’s Crusty Bloomers (TM), Paul Hollywood just wasn’t cutting it for me anymore. This is where the Bing rabbit-hole led me to Bake With Jack.
I learnt a lot from his blog and videos in mastering my basic white bread, so my first few faltering footsteps into the world of Artisanal Sourdough were mostly made following his methods.
I’d tried other methods a year or so earlier, but at Christmas 2019 when I stumbled upon Jack’s Sourdough Starter method it seemed so easy and compared to most sites, less waffle! Within a week I was making Jack’s Sourdough Loaf for Beginners with varying success.
Further reading around the web led me to believe that a lot of people place their faith in FLOUR WATER SALT YEAST (Ken Forkish) and TARTINE BREAD (Chad Robertson/Ken Wolfinger). These and other recipes from the web seemed to have a few things in common:
1) Autolyse
2) Stretch & Fold
3) Bulk Ferment
4) Shape
5) Final Prove
6) Bake with steam
Autolyse
Autolysis is the process of hydrating flour with water. Basically, mix the water and flour until a shaggy ball, then leave it. Some say 30 minutes, other say overnight, a lot of people recommend 1-4 hours.
Others will autolyse with starter combined, yet other will add the starter and salt (like Jack) and at that point you’re technically resting a dough.
Here is more info on autolyse than I could ever hope to master. But the takeaway – for me – is that good gluten development is what matters, however you achieve it. I generally stick with Jack on this and throw it all in at once and mix by hand, resting before the first round of stretch & folds.
Stretch & Fold
So many different ways to skin this cat. Most people will pinch the dough at a cardinal point, pull upwards until you feel the tension, then fold over the ball of dough in your bowl. Repeat for all four cardinal points.
Yet others will pick up in the middle, some will s&f 12 times instead of four, some will do it on the bench.

Timing is another consideration, do we do it 20 or 30 minutes apart? Or one hour?
For me, the important point is time for gluten to develop and that means early on your dough will be super stretchy and later will get tighter and stretch less. Unlike yeasted bread which is often left to rise “until doubled”, sourdough only needs to increase somewhere around 50-70% before shaping.
Bulk Ferment
My Granny used to call this proving, but in the Artisanal Sourdough world, they call the first period of rising the Bulk Ferment. Pretentious twaddle.

In any case, at this stage you are leaving your dough alone to get on with the job of increasing in size. In an average kitchen (I’m told that’s 21°C) this will be around 4-6 hours, including the stretch & fold period. My kitchen in Hong Kong in February is running 24°C so my timings are a little shorter. Some people do this for 12 hours in a very cool place, or the fridge.
My method aims for four stretch & folds every 30 minutes for two hours, followed by 2-3 hours of bulk ferment. I say “aims” because I often get distracted.
Shape
So technically there is a pre-shape and shape phase. Depends on whether you rest before the final shape. I find this rest period is crucial to helping build that necessary tension you need on the dough surface to avoid collapse in the oven.
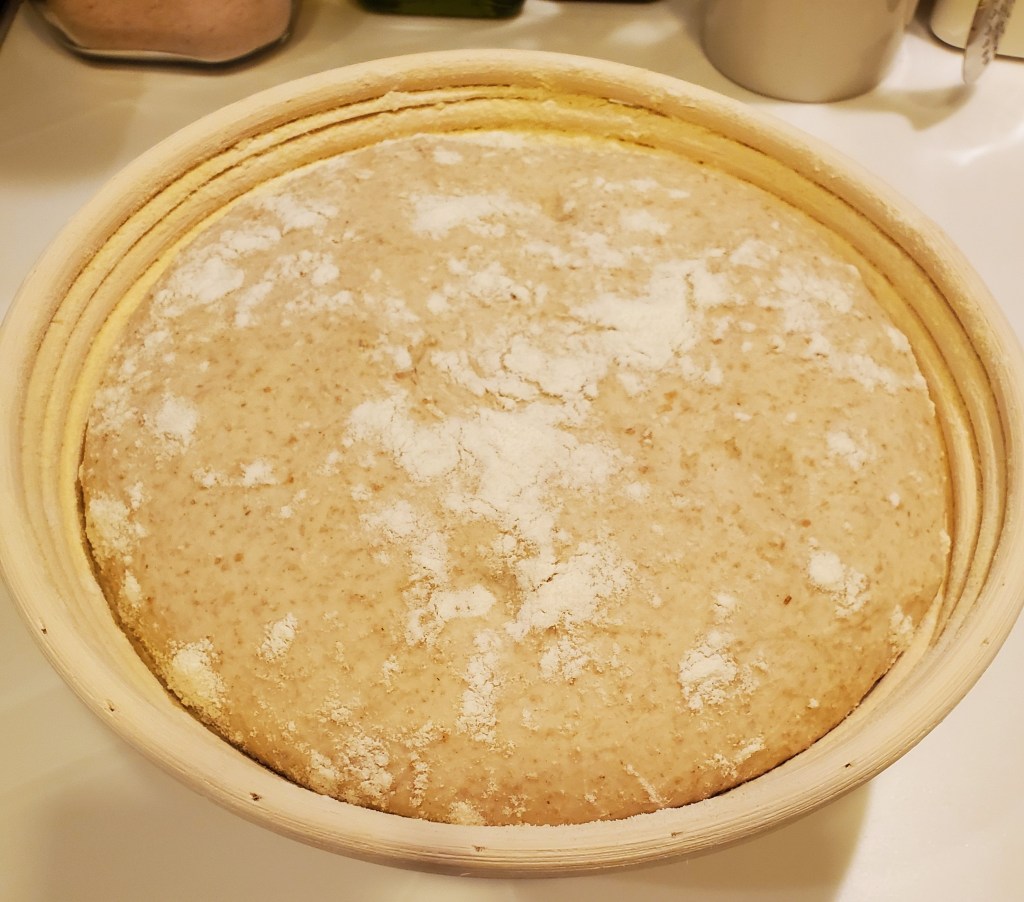
Easiest is the boule – or ball, closely followed by the oval shape. I didn’t have any fancy proving baskets or bannetons but I did have a colander and heavily floured tea-towel that worked just the same. So I went with the boule.
The methods differ slightly when shaping, but honestly the principle of developing good surface tension are true for all.
I usually pre-shape in to a ball, rest for 30 minutes then re-shape into a tighter ball before it goes in the colander.
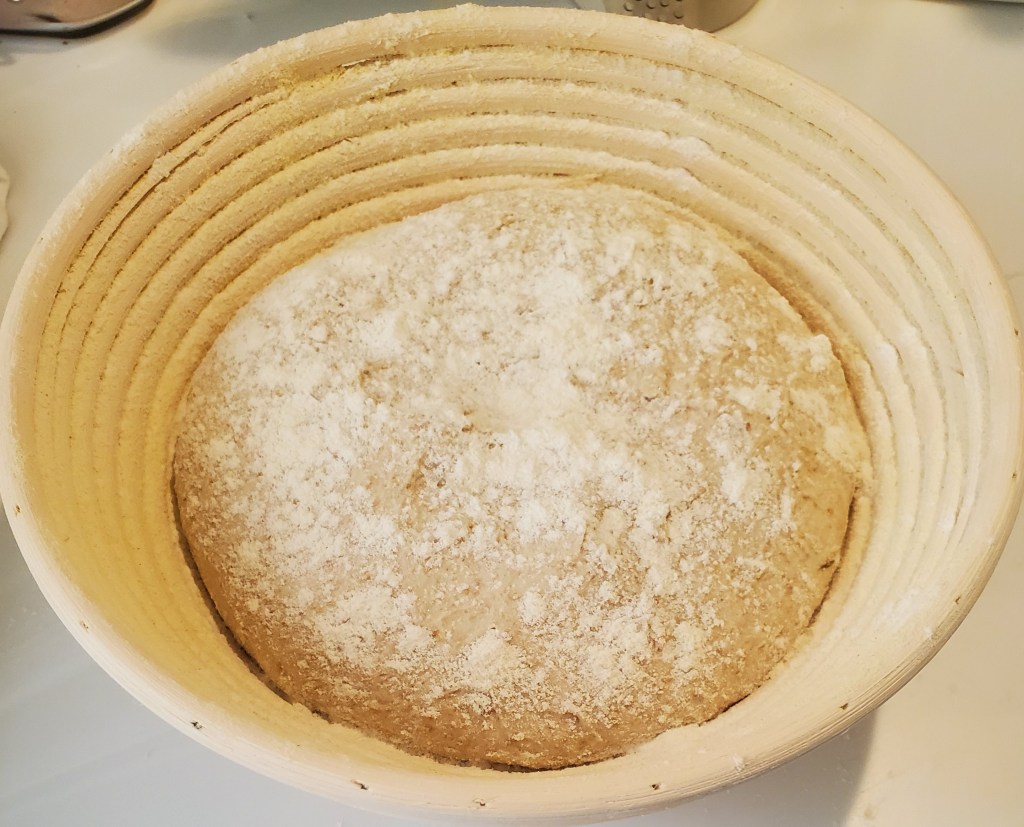
Final Prove
Most everyone agrees that the longer the prove, the better the taste as it has more time to develop.
Techniques include proving at room temperature, in a cooler room, or in the fridge. Times range from 6-16 hours with lower temperatures taking longer.
I generally shove it in the fridge and bake when I wake up – that could be 8, 12 or 14 hours later. Note: waking up is not the same as getting out of bed. Sometimes I need a coffee first.
Bake With Steam
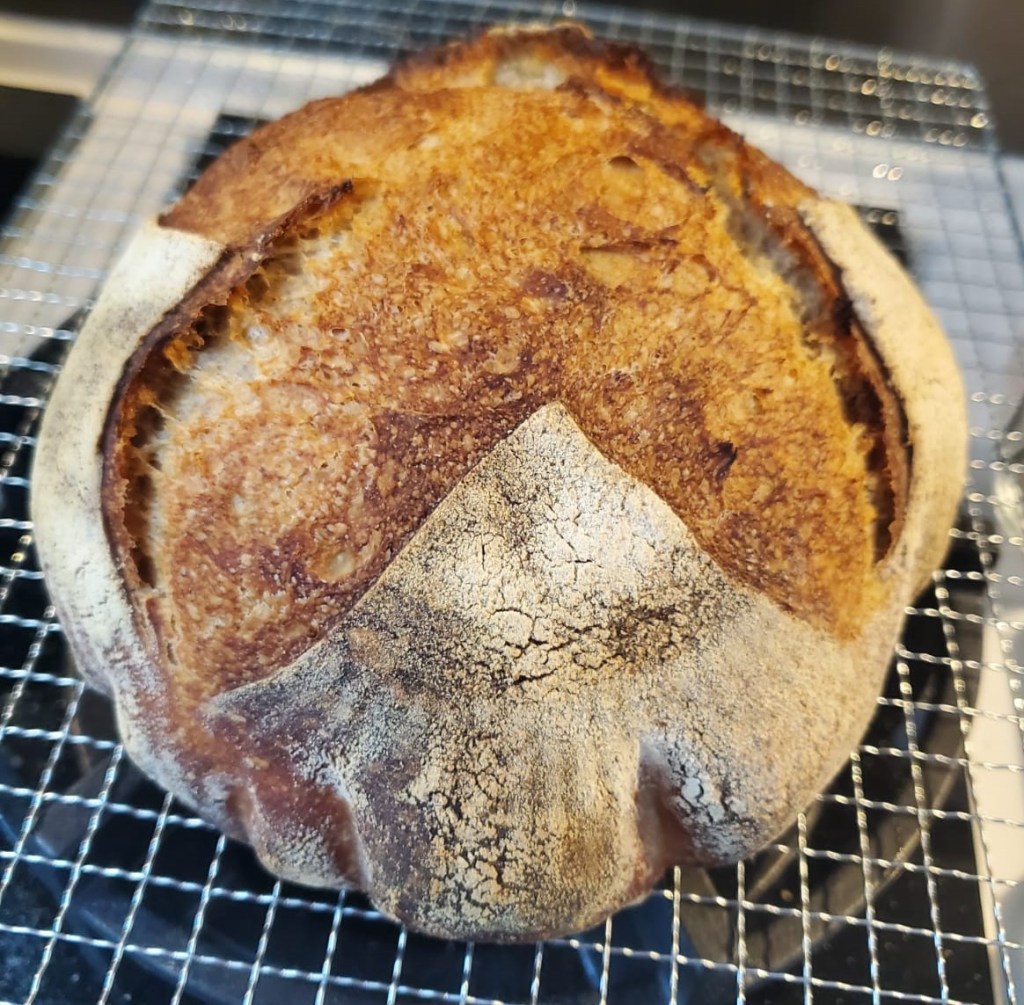
Search long enough and you’ll find someone that recommends putting a deep baking tray at the bottom of the oven and throwing in a cup of boiling water just as you close the oven door to bake. It’s achievable in any domestic kitchen. Some people use ice cubes. Either way, anything that makes steam is good as it provides a great crunch to the finished crust.
I’ve even tried with the steam setting on my table-top cooker, but not much luck with that so far.
For me, the best guaranteed method is to bake in a dutch oven or similar pot, so the moisture from the bread remains inside and serves the same purpose. Generally, most recipes call for pre-heating a cast iron dutch oven for an hour as you pre-heat the oven.
My method is to take the bread out of the fridge and at the same time start the pre-heat. I pre-heat for around an hour, using either a cast iron (non-enamelled) dutch oven or a glass casserole dish. I’ve had more consistent success with the glass casserole dish, either because it seals better or because it’s smaller and less volume for the steam to occupy. I dunno why.
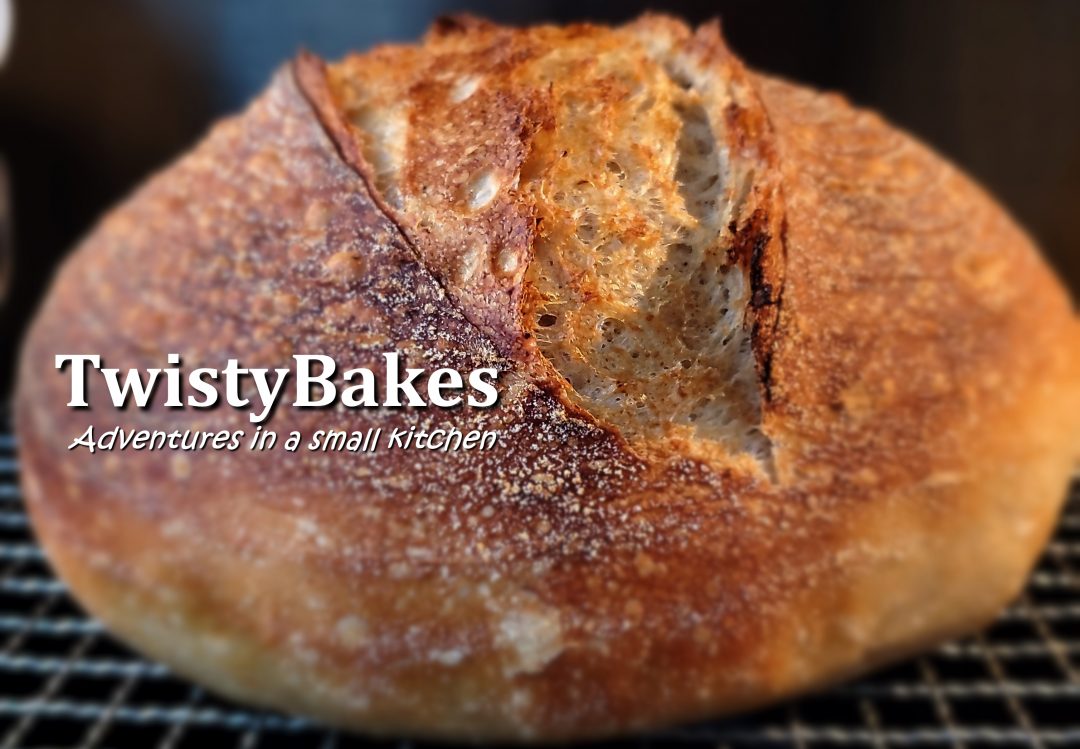
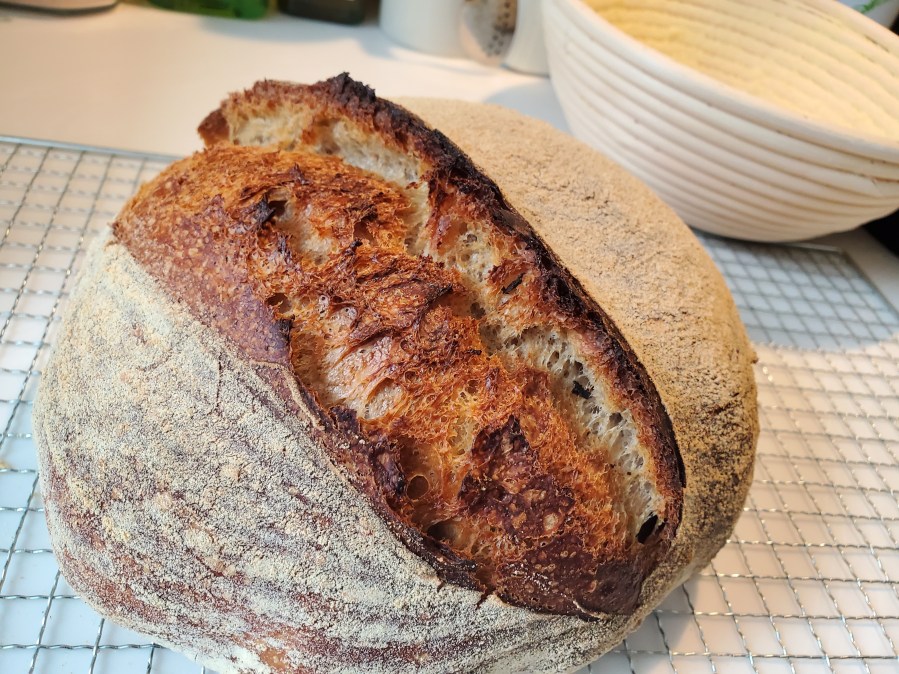
I will bake for 20 minutes at 250°C, then remove the cover and bake a further 25 minutes or so at 220°C. The first part gives the steam time to work it’s magic and produce that holy grail of oven-spring (assuming you built enough tension) and the second part gives the appetising deep golden colour.
I have more details on my process on my recipe pages. You can click here for Twisty Sourdough and Twisty Country Sourdough.
