
Adapted from Bake With Jack
Ingredients
- 450g Strong White Bread Flour
- 310g water at room temperature
- 100g of Rye Sourdough Starter
- 10g Fine Salt
Method
- Mix everything until formed in to a shaggy ball. Cover bowl with tea towel/shower cap/cling film and rest for 30mins.
- Stretch & fold every 30 mins, total of four times over 90 minutes
- Bulk ferment another 2 hours
- Final stretch and fold
- Pre-shape and rest 30 mins
- Shape and place in banneton – ensure good surface tension before turning over in to banneton
- Prove overnight in fridge (or 4-6 hrs in kitchen)
- Morning of: heat pot in oven at around 250c for one hour
- When oven is hot, turn banneton out on to parchment/baking paper, transfer to pot (including parchment)
- Dust and score loaf
- Bake at 250c for 20 mins
- Remove lid, continue to bake at 220c for another 25 mins. or until internal temperature reaches 95-99°C.
- Cool on a wire rack.
Commentary
Mix everything until formed in to a shaggy ball. Cover bowl with tea towel/shower cap/cling film and rest for 30mins.
Literally, carefully measure everything in to a single large bowl. Then I just get my hand in there and start squeezing the water and starter through the flour until it is fully incorporated and still a bit shaggy. Cover it somehow, it doesn’t matter how. You just want to avoid loss of moisture. Plastic is possibly better for this, but I have a few Jamie Oliver tea towels I was gifted that aren’t suitable for public view so I use those. (They’re washed without detergent to avoid any floral scents transferring). I sometimes use a shower cap until they fall apart.
I’ve been experimenting with Autolysis – that is where the flour and water are mixed first and left to rest for 2-4hrs to get a jump start on gluten development, before the starter and salt are added. Honestly, I haven’t found much difference to the end loaf and I’m lazy so generally in this recipe I don’t bother.
Stretch & fold every 30 mins, total of four times over 90 minutes
If you’ve watched any YouTube videos then you probably know what I mean. If you haven’t then go watch.
In any case, I leave the dough in the bowl and wet my fingers in cold water to avoid sticking.
Slide fingers underneath the dough and pinch loosely a handful, stretch it upwards and stop before it snaps. You’ll probably get a good 20cm+. Fold this stretch over the ball of dough still in the bowl.
Turn the bowl 90°, and repeat.
Turn the bowl 90°, and repeat.
Turn the bowl 90°, and repeat.
Done.
By the time you get to the 4th stretch, you will find that the dough is tighter and less willing to stretch.
Now repeat the above process after 30, 60 and 90minutes. Each time you will find the dough is a little less stretchy as the dough tightens. By the end the dough will retain it’s shape but still spread in the bowl. And you should be experiencing some puffiness in the dough by now.

Bulk ferment another 2 hours
Literally, just leave the cover on and let it be. Leave it on the side in the kitchen until you’ve got 50%-70% increase in volume.

- Final stretch and fold
- Pre-shape and rest 30 mins
I sort of combine these two steps.
I very lightly dust the top of the dough and the work surface, then empty the bowl until the two floured surfaces meet.
If the dough it a double-dose, I will divide here.
Next, grab the edge at about 1 O’clock and pull out just a bit, then up and over it to the centre. Do this all the way around until the edges are all folded into the middle. You’re sticking the sticky top to itself, leaving the floured surface on the outside. Be firm but gentle, you don’t want to degass the dough, but you are beginning to build that tension (which is currently on the underside). If the dough is sticking to the counter, use a bench scraper to shimmy a little flour underneath, and use the bench scraper to help you grab the edge before pulling up and over to the centre.
Next, turn the dough with the seams down and you’ll have a sort-of-ball. Place a hand either side and over the dough with your little fingers on the far side countertop. Use your ring fingers to pull the dough towards yourself, using your whole hands to keep it steady. You definitely don’t want much flour on the work surface at this point, as you need the friction to help you tighten this ball up.
Turn through 90° and pull towards you again. Repeat a couple of times until the ball feels firm. Cover and let it rest for 30 minutes.
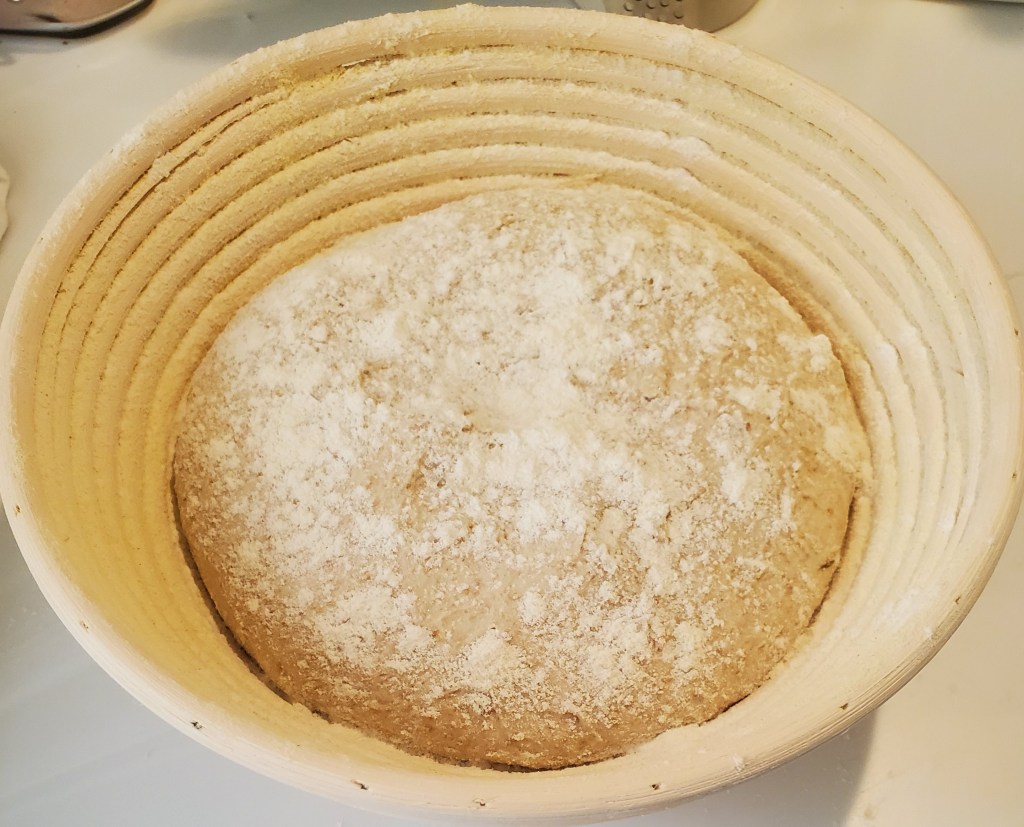
Shape and place in banneton – ensure good surface tension before turning over in to banneton
While resting on the bench, prepare your proving basket. This might be a $30 organic banneton from Amazon, or it might be a colander with a linen tea-towel in it. In either case, for first use I usually make the banneton or tea-towel a little damp, which helps the flour stick. Liberally sprinkle on a flour that doesn’t subtract moisture from the dough – I use corn meal because I like the yellow look after baking, but rice flour is good too, and whiter in the end product.
You’ve probably rested the dough with the smooth surface on top. Turn it over, and do the part where you grab the edges and bring them up and over to the middle again. Then turn it over and pull towards you along the counter to create that nice surface tension again. Gently place in your well-floured proving basket with the seam side UP and the smooth, tight surface facing DOWN.
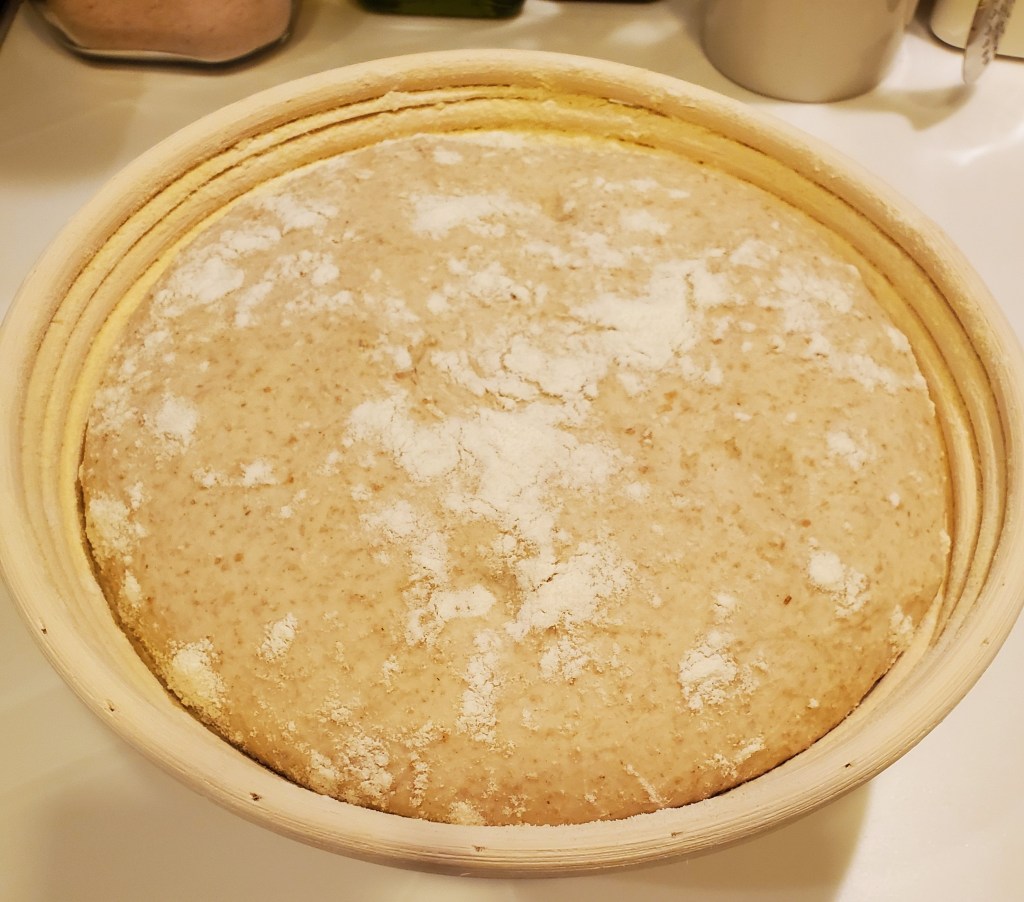
Prove overnight in fridge (or 4-6 hrs in kitchen)
Now it depends on the time of day as to what you do next. If it is early/mid afternoon and I want to bake at night then I would cover and leave it on the side for 4-6 hours.
Usually though I will place in the fridge uncovered or at most with a tea-towel. The lack of cover will draw moisture from the surface of the dough and make it firmer – more surface tension, right? I then forget it for 12-14 hours.
Morning of: heat pot in oven at around 250°c for one hour
I started baking with a glass pyrex casserole dish with a flat lid for my baking. Now I alternate with a large Dutch Oven depending on my mood.
I turn the casserole upside down (this helps later), put it on a middle shelf and then preheat the oven for 45-60minutes at 250°C.
At the same time as turning on the oven, I bring the dough out of the fridge to wake up a little before baking.
When oven is hot, turn banneton out on to parchment/baking paper, transfer to pot (including parchment)
Grab the pot from the oven and take the lid off. In my case, take the bottom off because it’s upside down. It you’re careful and accurate you can turn the banneton out straight on to the lid. If you’re clumsy like me, then cut some parchment/baking paper to a size slightly larger than your banneton, place it over the top. Put a cutting board (or Baker’s Peel if you have one) on top of that then invert the whole lot and removing the banneton. You can then use the parchment as a cradle to drop the dough in to the hot lid, paper and all.
If your shaping was good and the dough doesn’t spread out at this point, you’re in a good place.
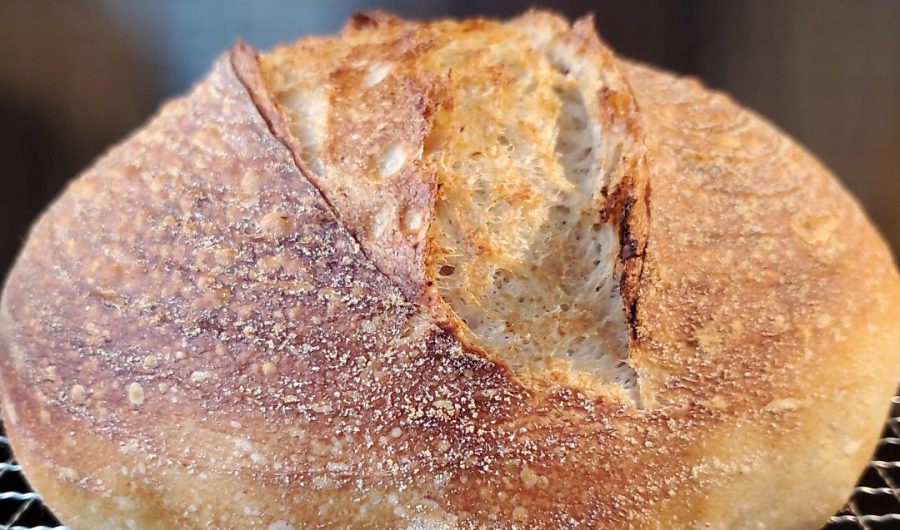
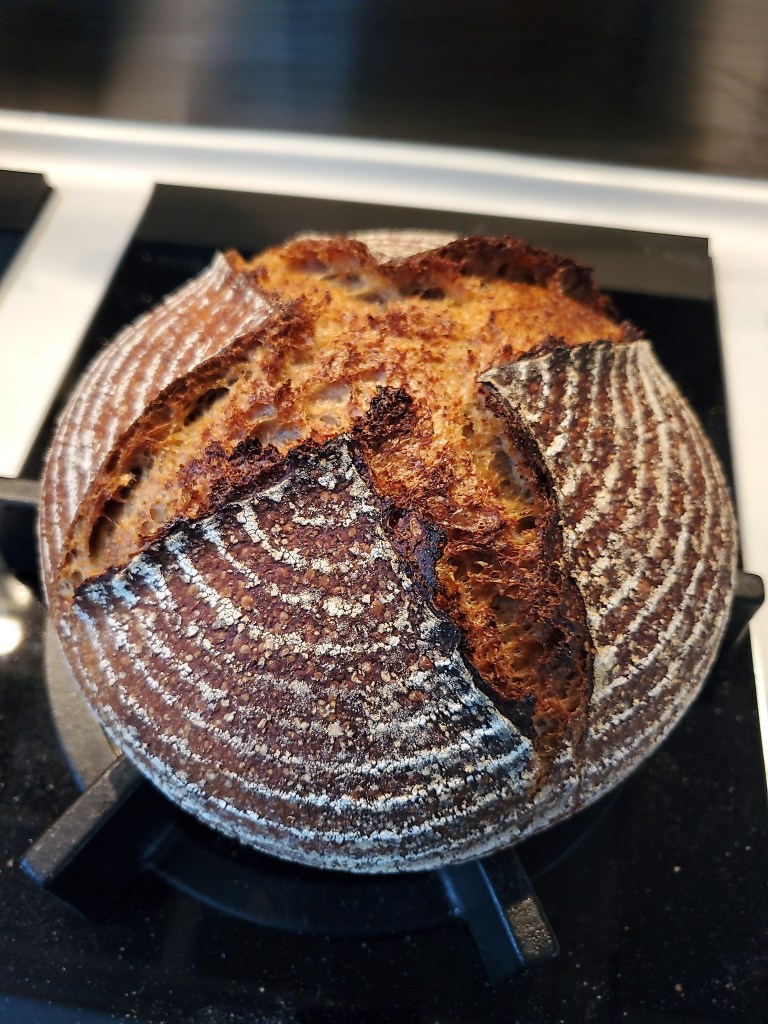
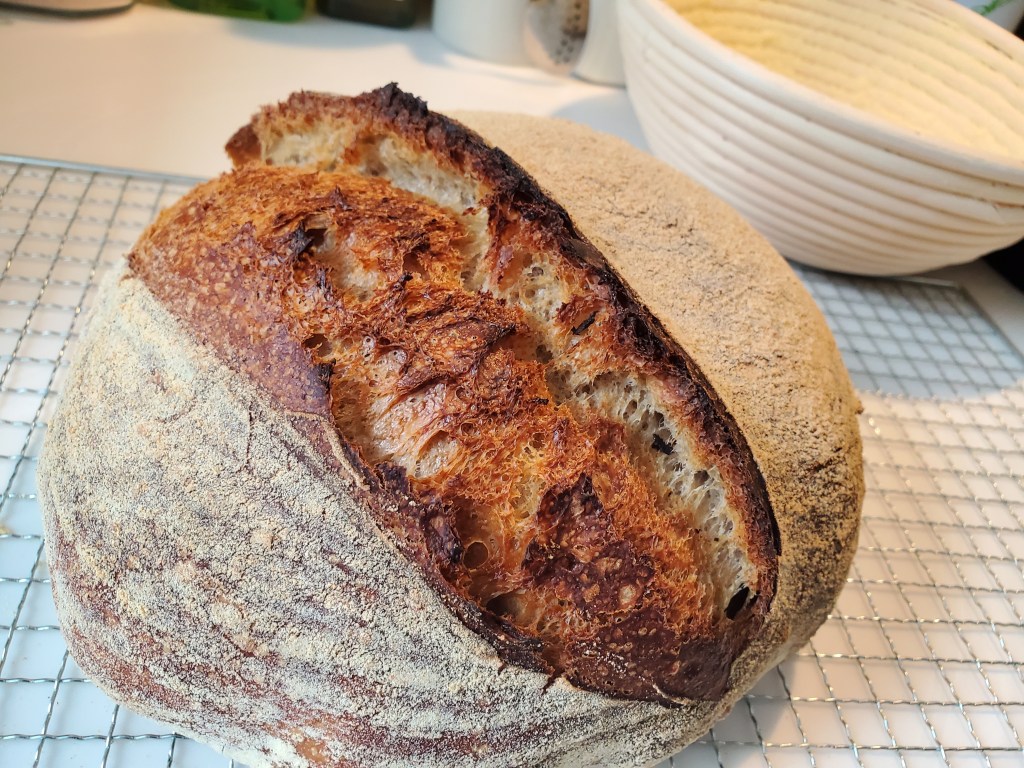
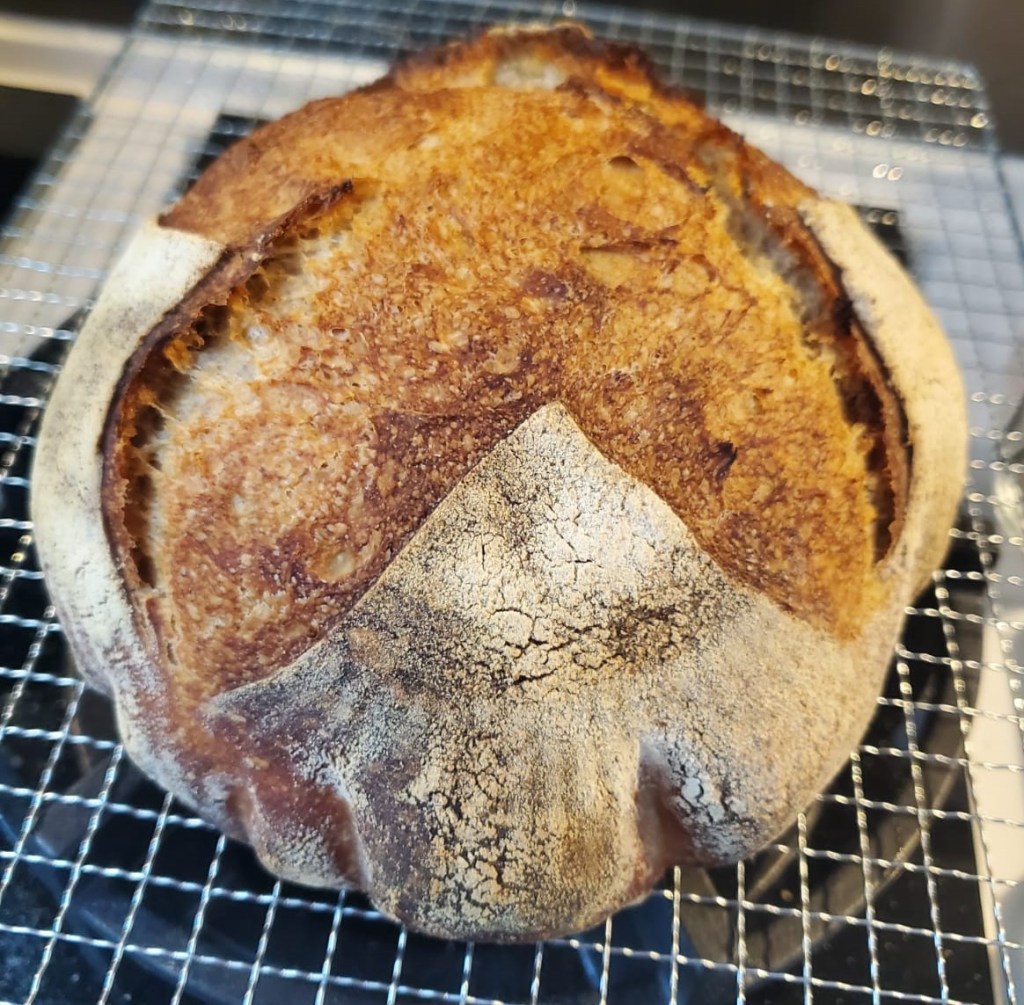
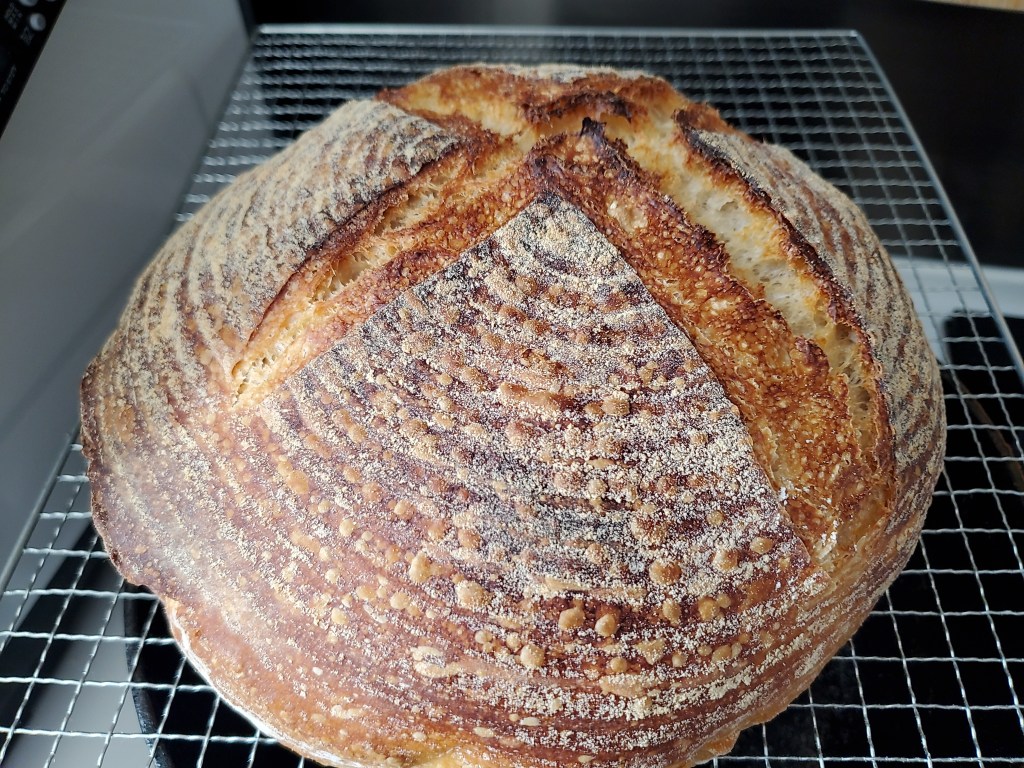
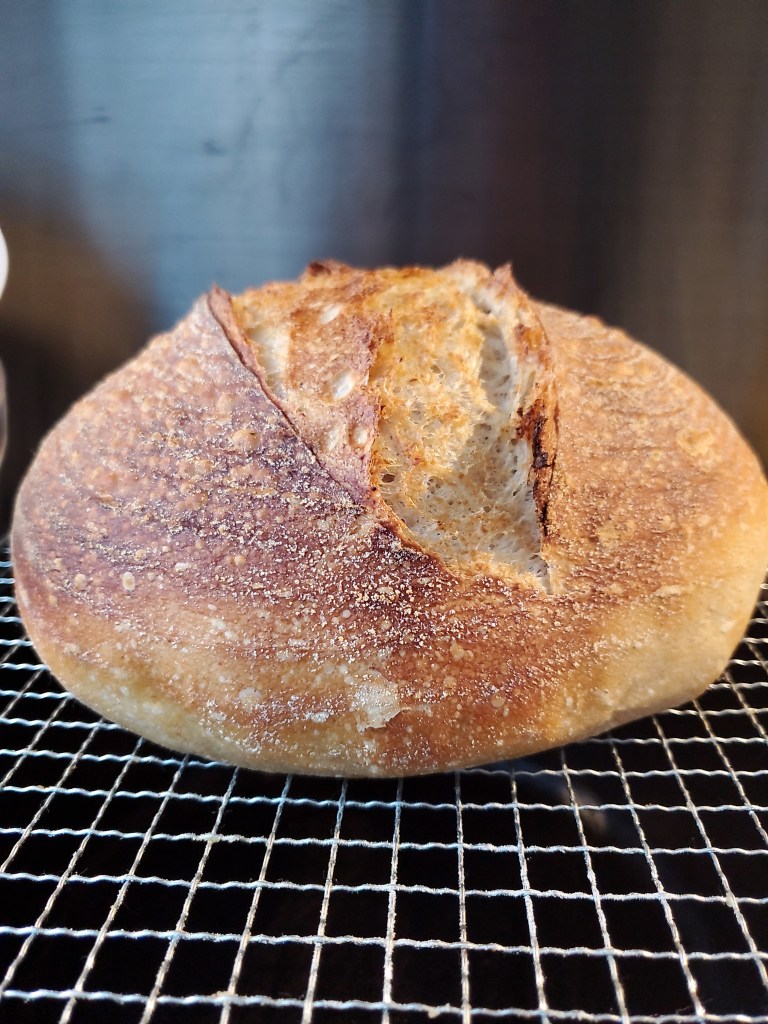
At this point you can score the loaf. One off-centre slit is classic but you can experiment. A decent sharp knife is good enough, but Amazon would be glad to relieve you of $15 for an expensive razor-blade holder to do the same job, called a Lame or Gringette. When you slice, don’t go too deep – just a few of mm to break the surface is fine.
If you don’t have an inverted dutch oven or casserole, you probably want to score the loaf before it goes in, as trying to score inside a 250°C pot with tall sides is not recommended.
Bake at 250c for 20 min
Get the lid (or bottom) back on your pot and back on to the middle shelf, minimising time the oven door is open to keep that heat high.
Most of the “oven spring” or rise of the loaf will happen in the first 10-15 minutes. After 20 minutes the shape is well and truly set, so now you can focus on cooking it and the colour.
Remove lid, continue to bake at 220c for another 25 mins. or until internal temperature reaches 95-99°C.
You’ll need to cook it all the way through. The old method was to tap the bottom to see if it sounds hollow and that works well enough most of the time. But a probe thermometer reading of 95-99°C is your guarantee.
Once cooked properly, you can focus on colour – this might mean a little longer in the oven if you prefer a darker loaf with the “ears” (where you sliced) getting nice and crispy.
Cool on a wire rack.
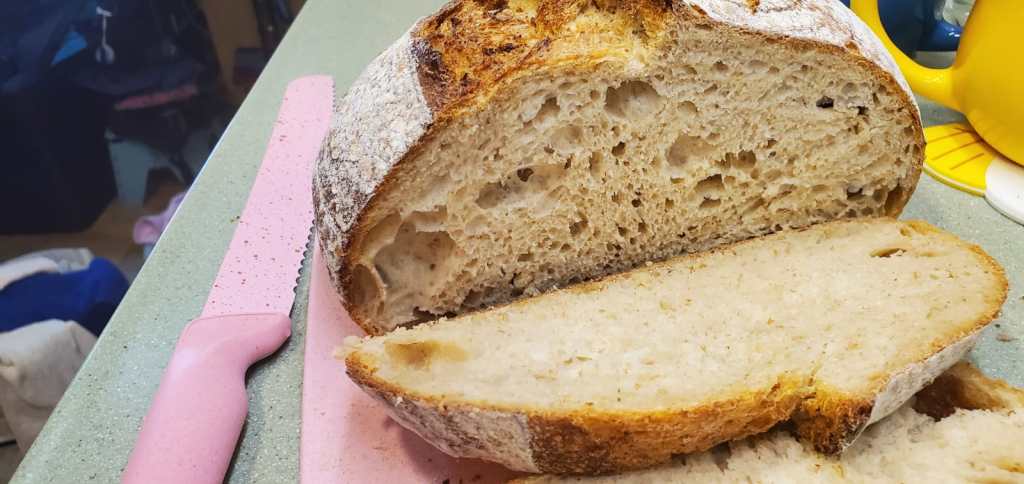
I can’t stress this enough. The oven part is over, but your bread isn’t ready. All that heat and steam is still doing wonderful things inside your bread. If you cut it now, chances are you’ll get stodgy crumb, so leave it be. Admire it and take photos as it cools. Listen to the crispy crust sing.
Don’t cover it as it cools, this will turn the crust soggy. Once cool you should also avoid humid environments and plastic bags. Best stored in a linen bread bag or a wooden bread bin.
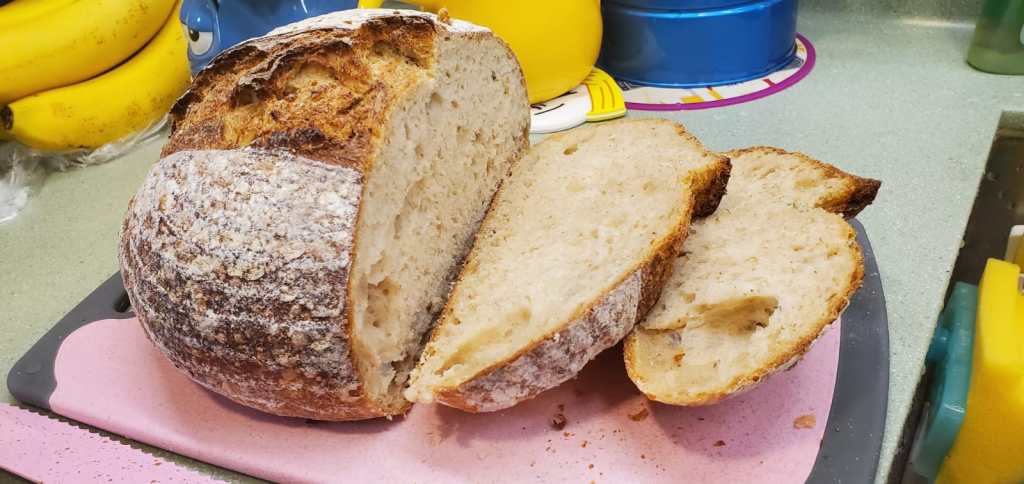
Slice that baby open!
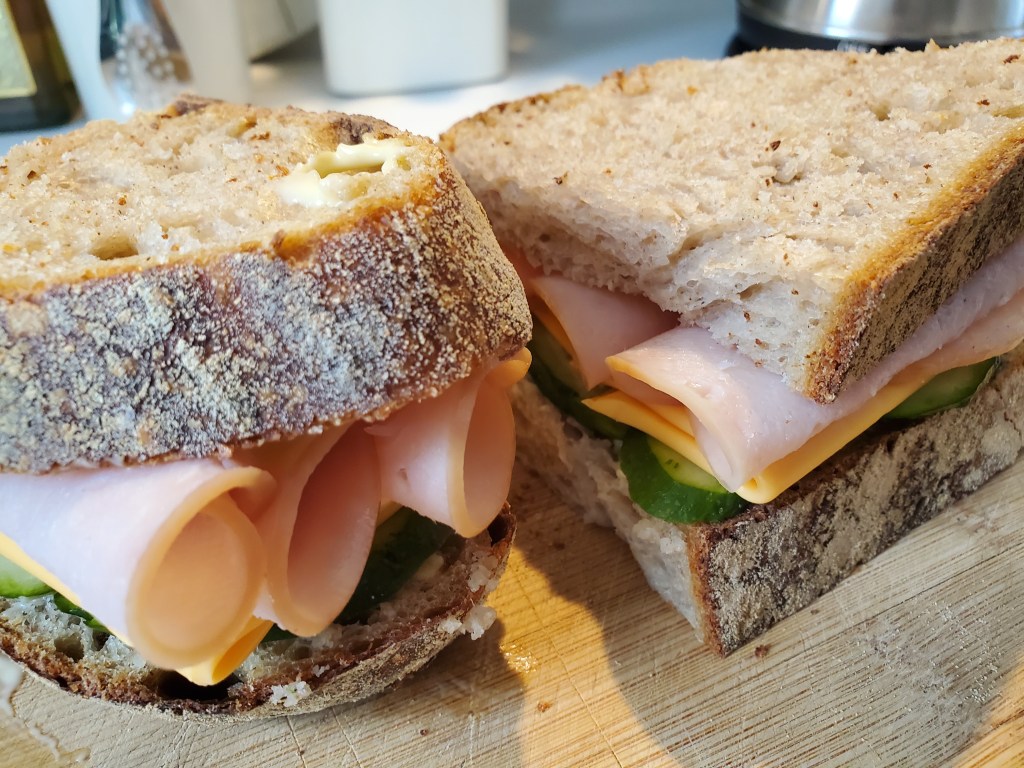
And enjoy. Expect a crunchy crust, a glossy, chewy crumb, and complex depth of flavour. Best served only with butter I think, but good for fancy sandwiches too.


One thought on “Twisty Sourdough”